Your terminal can be much, MUCH more productive 💻
What about drastically reduce the time spent on daily tasks in terminal? 😉
Portuguese version: https://medium.com/@ivanaugustobd/seu-terminal-pode-ser-muito-muito-mais-produtivo-3159c8ef77b2
Our goal
A terminal that can pratically predict what you want to type, save a lot of repetitive commands, give you a really powerful autocomplete, let you search for files using Ctrl+T like in your editor/IDE and have a pretty visual!
The prints below will have a different visual of the video above because I’ve created a VM with a (almost, I’ve changed the theme) clean install of a Fedora spin, to guarantee that nothing would be forgotten.
Although that was written using Fedora, it probably will work in any Linux distro (or even BSD and MacOS)..
Update: Marc Pires and Beto Alves just confirmed (here and here, respectively) that it works with MacOS too!
Don’t worry about the names that maybe you don’t know (yet), just carry on and you will see that it’s simple 🙂
Let’s start!
1°) ZSH. For now, you just need to know that it is a shell ridiculously customizable that will allow us to do what we want.
In all OSs that I’ve tested/used, the package name is zsh, so just install it using your system’s package manager:
Fedora: dnf install zsh
Arch: pacman -S zsh zsh-completions
*SUSE: zypper in zsh
Ubuntu: apt install zsh
*BSD: pkg install zsh bash
2°) Oh My Zsh. It will bootstrap the ZSH setup for you (during the installation, it will ask for your password, but that is just to set ZSH as your default shell):
curl -fsSL https://raw.githubusercontent.com/robbyrussell/oh-my-zsh/master/tools/install.sh | sh; zshIf all goes right, you will see that screen now:
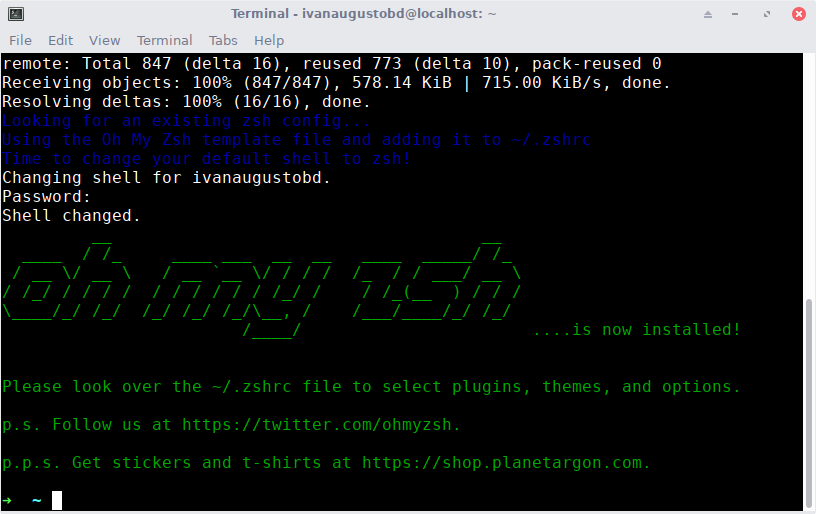
If it don’t show you the message “Shell changed.” just before the Oh My ZSH logo, maybe the script wasn’t able to change your default shell. In that case, you can manually change it using sudo usermod --shell $(which zsh) <your_username> .
If you just open another terminal tab it will still using your older shell, but the next time you login in your system it will be ZSH already.
Ok, now you already has an ridiculously powerful autocomplete! Try typing git <something> (or another thing that you use) and press <TAB> a couple of times to see all available options:
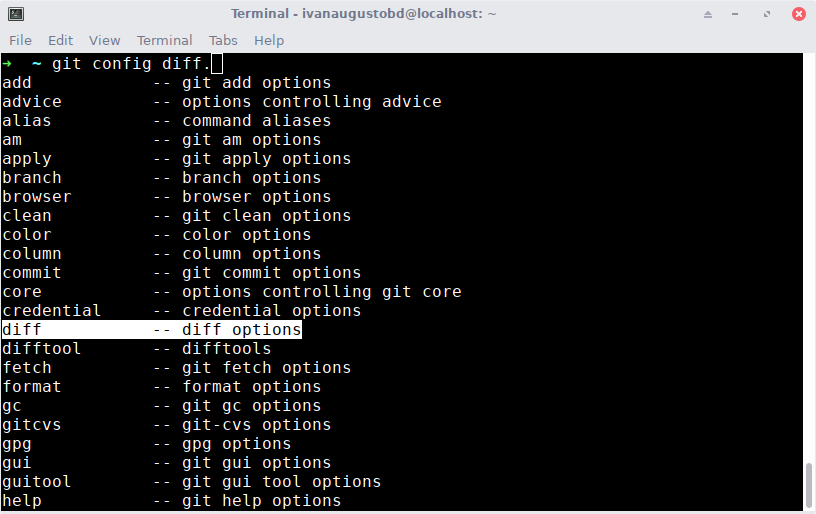
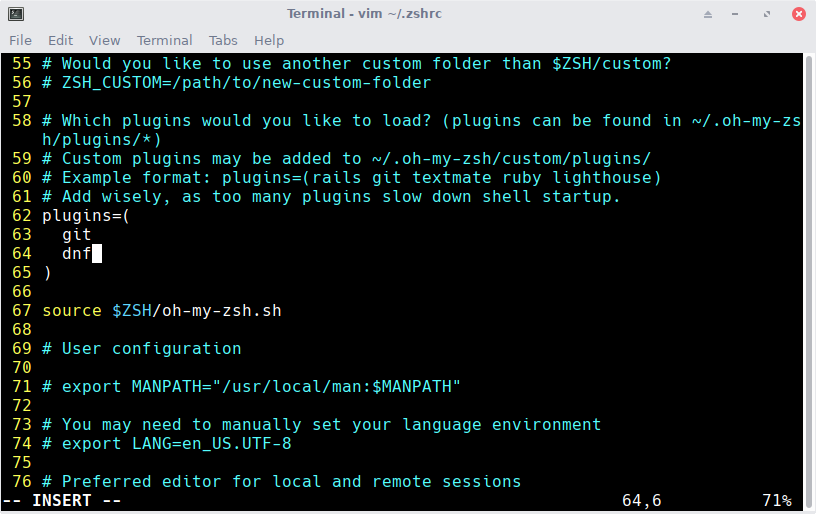
If the command that you tried won’t offer that suggestions, probably there will be a plugin for it. In any case, to enable a plugin, you just need to open the file ~/.zshrc add it in the plugins=(...) line. For example, to enable the dnf plugin:
For now on we will dive into visual and functional parts, and in any of it you just need to reopen your terminal or use source ~/.zshrc after each change to see it working immediately. Or.. you can just to everything and restart it just one time.
Functional — let’s put a s̶m̶i̶l̶e̶ ̶o̶n̶ ̶t̶h̶a̶t̶ ̶f̶a̶c̶e̶ lot of cool features in!
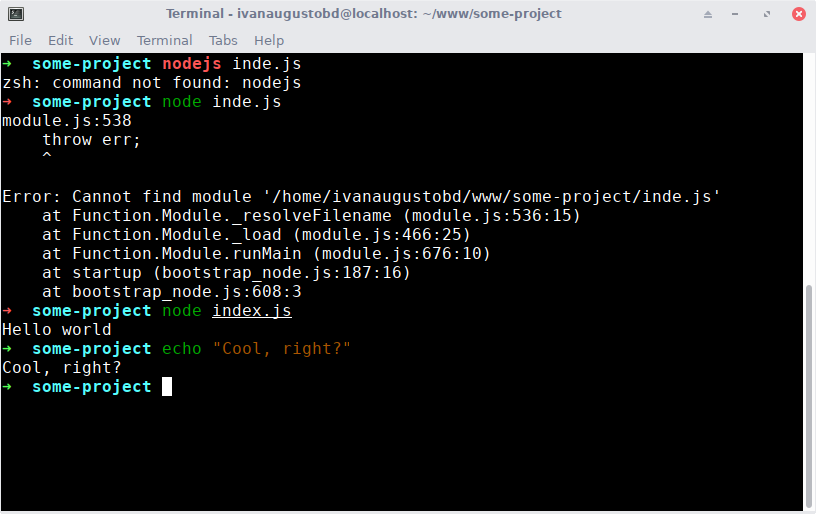
1°) zsh-syntax-highliting. Basically it make the command green if typed right, red if doesn’t, and underline existent folders/files.
git clone https://github.com/zsh-users/zsh-syntax-highlighting.git ${ZSH_CUSTOM:-~/.oh-my-zsh/custom}/plugins/zsh-syntax-highlightingNow add zsh-syntax-highlighting in your plugins list:
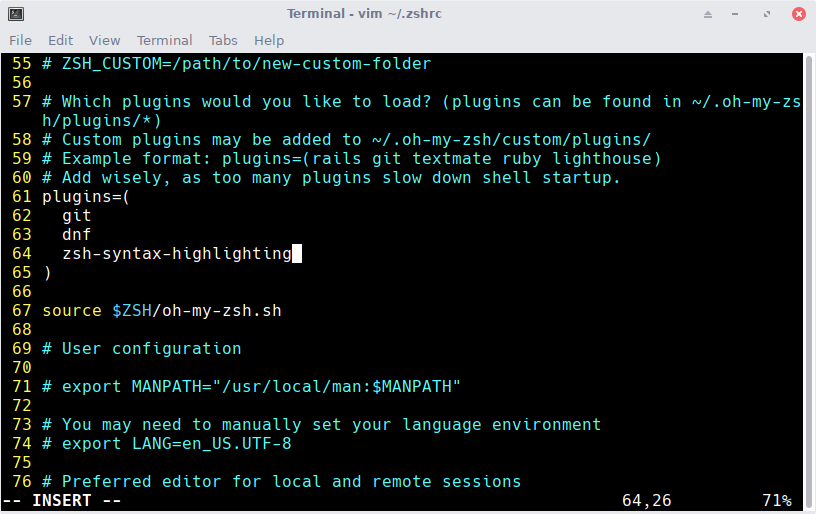
Now you’ll have something like this:
2°) zsh-autosuggestions. Autocomplete suggestions based in your history. That’s really useful for docker run , php artisanand mageruncommands!
git clone https://github.com/zsh-users/zsh-autosuggestions ${ZSH_CUSTOM:-~/.oh-my-zsh/custom}/plugins/zsh-autosuggestions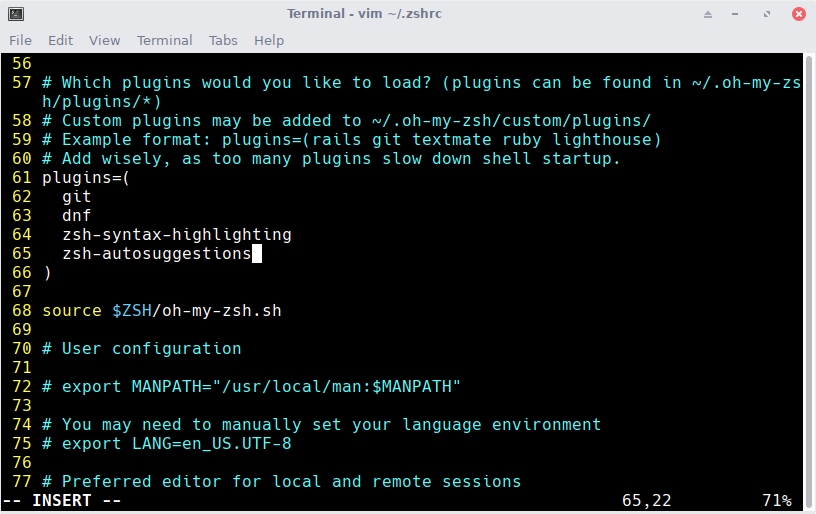
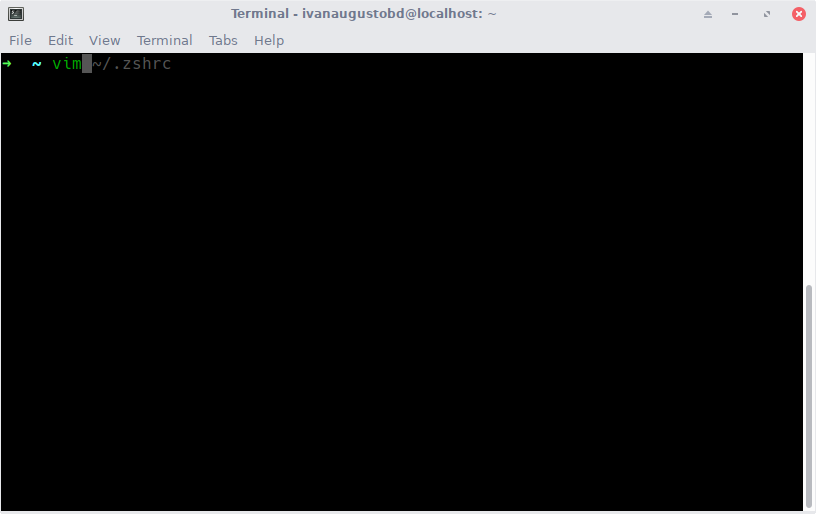
Now you will have something like that when typing a command for the second time:
3°) fzf. Simply a FUZZY FINDER IN YOUR TERMINAL!!
git clone --depth 1 https://github.com/junegunn/fzf.git ~/.fzf && ~/.fzf/installRemember to answer “y” to all questions!
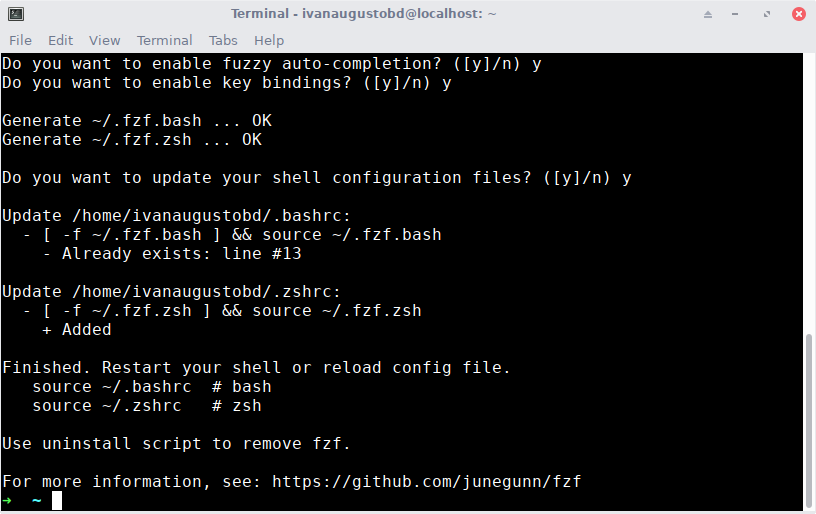
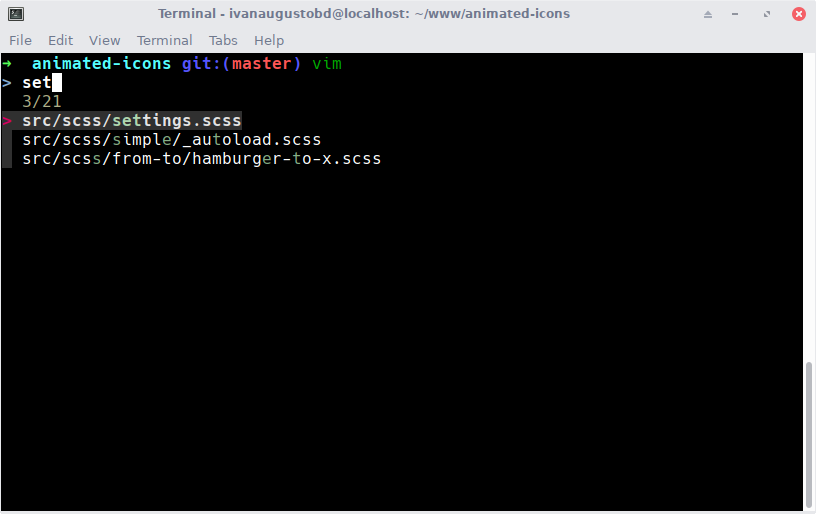
Now you can use Ctrl+T to search for files, like in your editor!
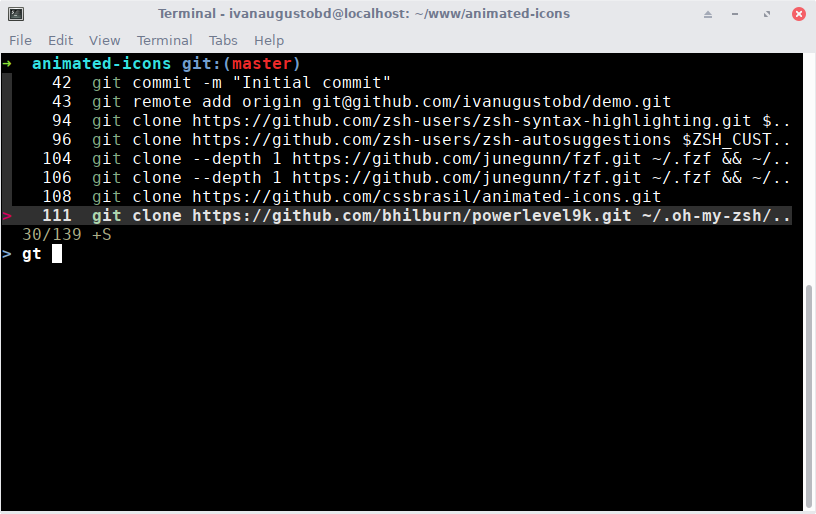
Oh, you can now search for commands in your history too using Ctrl+R!
Visual — what about a sexy terminal?
1°) Nerd Fonts. An “iconic font aggregator”, will some of the most popular monospaced fonts patched to support icons! Go to the Downloads section in their site and pick your favorite (personally I really like the Hack font for use in terminal, specially because it was made for it).
Now extract it and move the files into yours fonts folder (something like ~/.fonts or ~/.local/share/fonts):
mkdir ~/.fonts && cd ~/.fonts
unzip ~/Downloads/<the_chosen_font>.zip
And now changed to it in your terminal (something like Preferences->Appearance->Font):
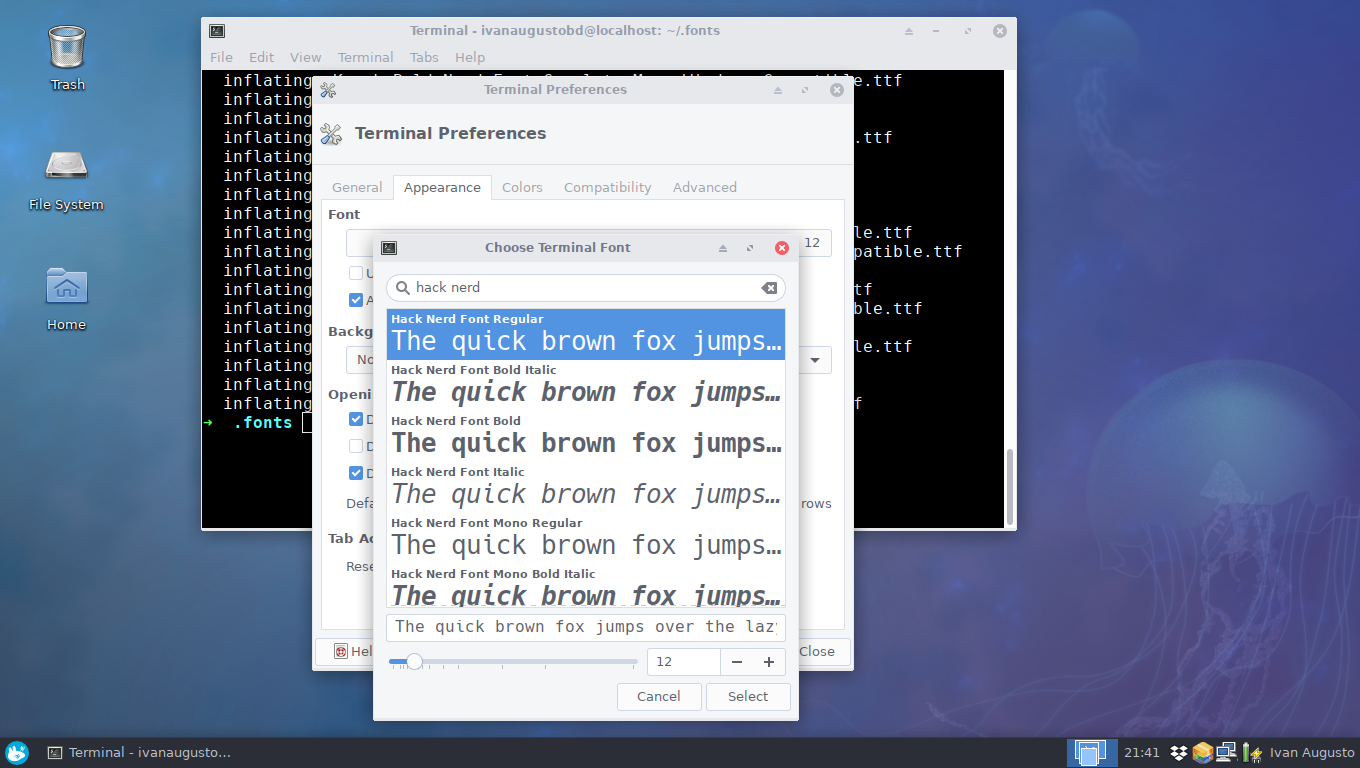
Now you have support to our next step — icons in your terminal.
2°) Powerlevel9k. A theme that supports icons and A LOT of customization, besides saving you some repetitive commands like git status because it show will some info about your project/system already 😆
UPDATE: you can use Powerlevel10K too; it’s a drop-inreplacement but faster
git clone https://github.com/bhilburn/powerlevel9k.git ~/.oh-my-zsh/custom/themes/powerlevel9kNow to enable it, change your ZSH_THEME (in the ~/.zshrc file) to powerlevel9k/powerlevel9k and add POWERLEVEL9K_MODE="nerdfont-complete" to add support for icons:
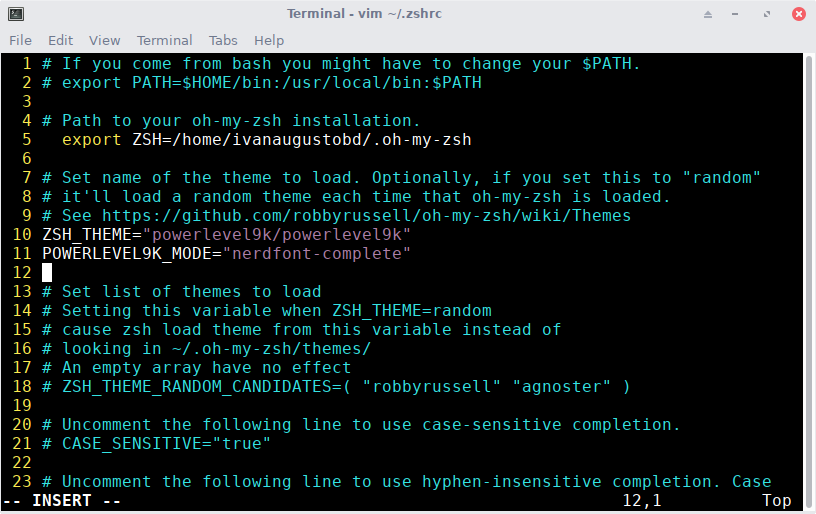
Close and reopen your terminal and voi lá!
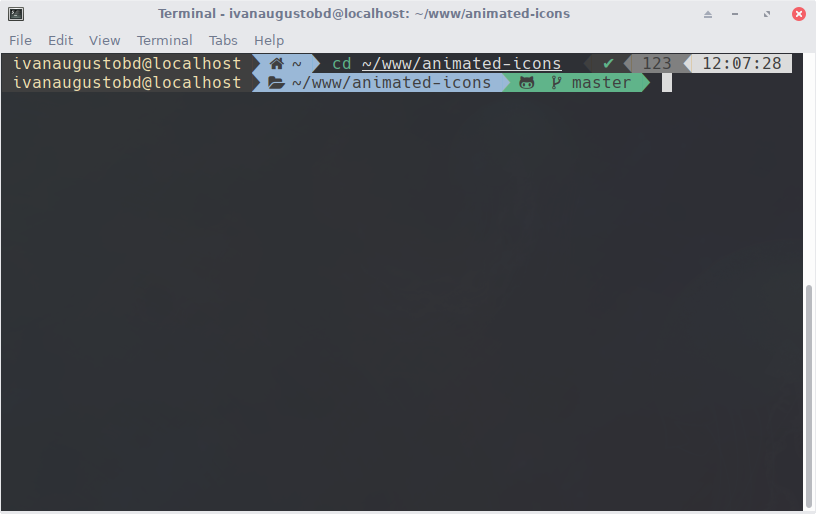
For default it shows your-username@host , followed by your actual path and the status of the project. And.. that is fully customizable! Take a look on their showcase to pick some ideas 😉
You can custom it just by adding POWERLEVEL9K_LEFT_PROMPT_ELEMENTS = (...elements) and/or POWERLEVEL9K_RIGHT_PROMPT_ELEMENTS = (...elements) your ~/.zshrc file, like that:
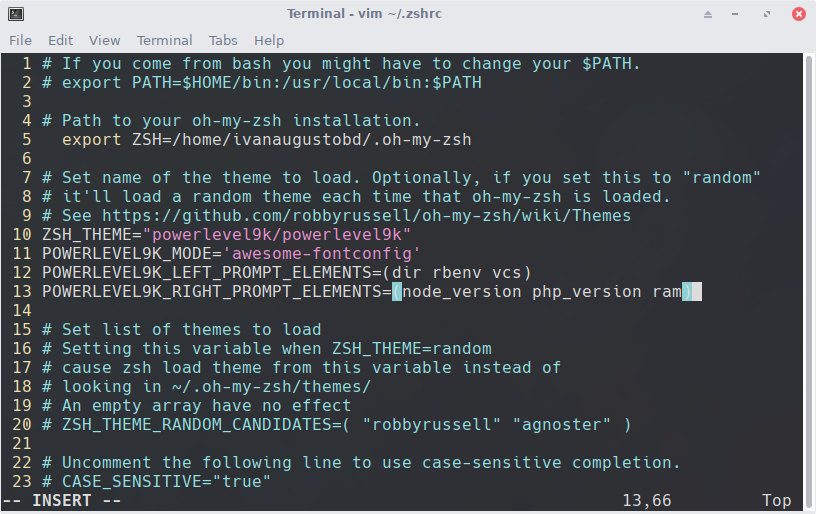
And when you launch your terminal again, well, just take a look at that:
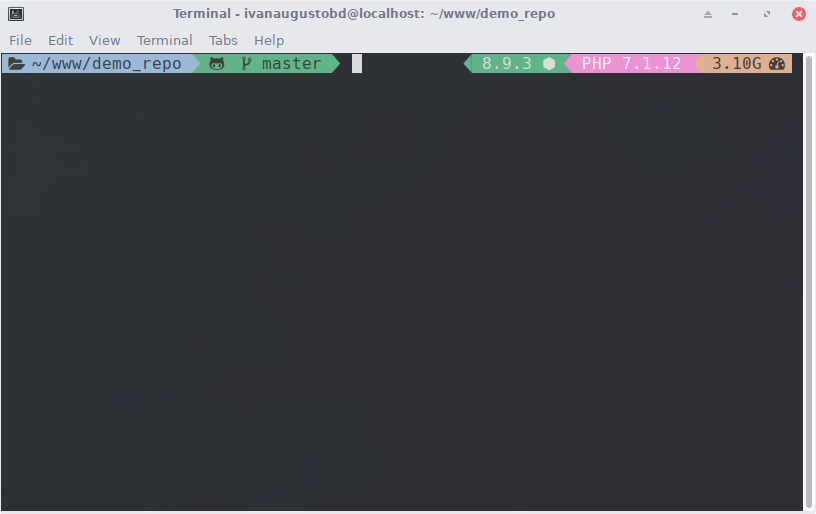
All custom options are available here.
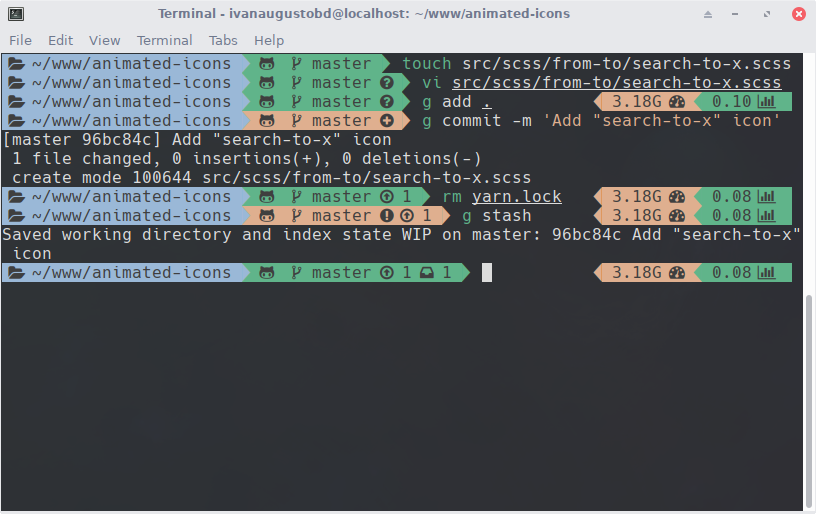
Now, when you add/edit/delete a file, change branches/tags or stash things, it will automatically change to show you what has made:
If you want more ideas, take a look here. 😉
Bonus
1°) Aliases. Basically a bunch of shortcuts to most used commands. Just add alias shortcut="command" in your ~/.zshrc file. Some ideas:
alias d="sudo docker"
alias m="mysql -u root -p"
alias vi="vim"
alias y="yarn"
alias yrw="yarn run watch"
alias yrp="yarn run prod"
alias gw="gulp watch"
With that your can run docker command as d run , mysql as m -v < dump.sql , gulp watch as simply gw and so on, use your imagination! Just remembering that some plugins (like Composer and DNF) already add some alias to you 😬
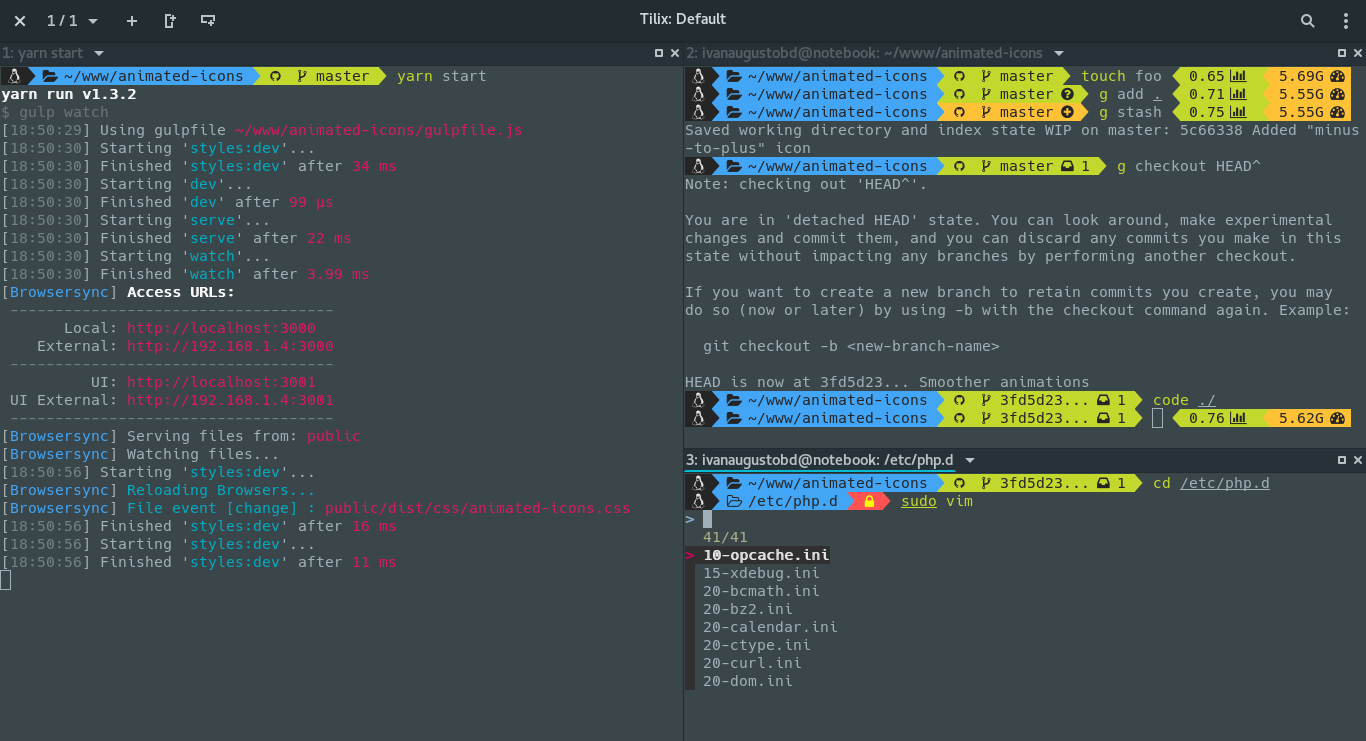
2°) Tilix. A lightweight terminal with support for tilling/split and some modern themes built-in!
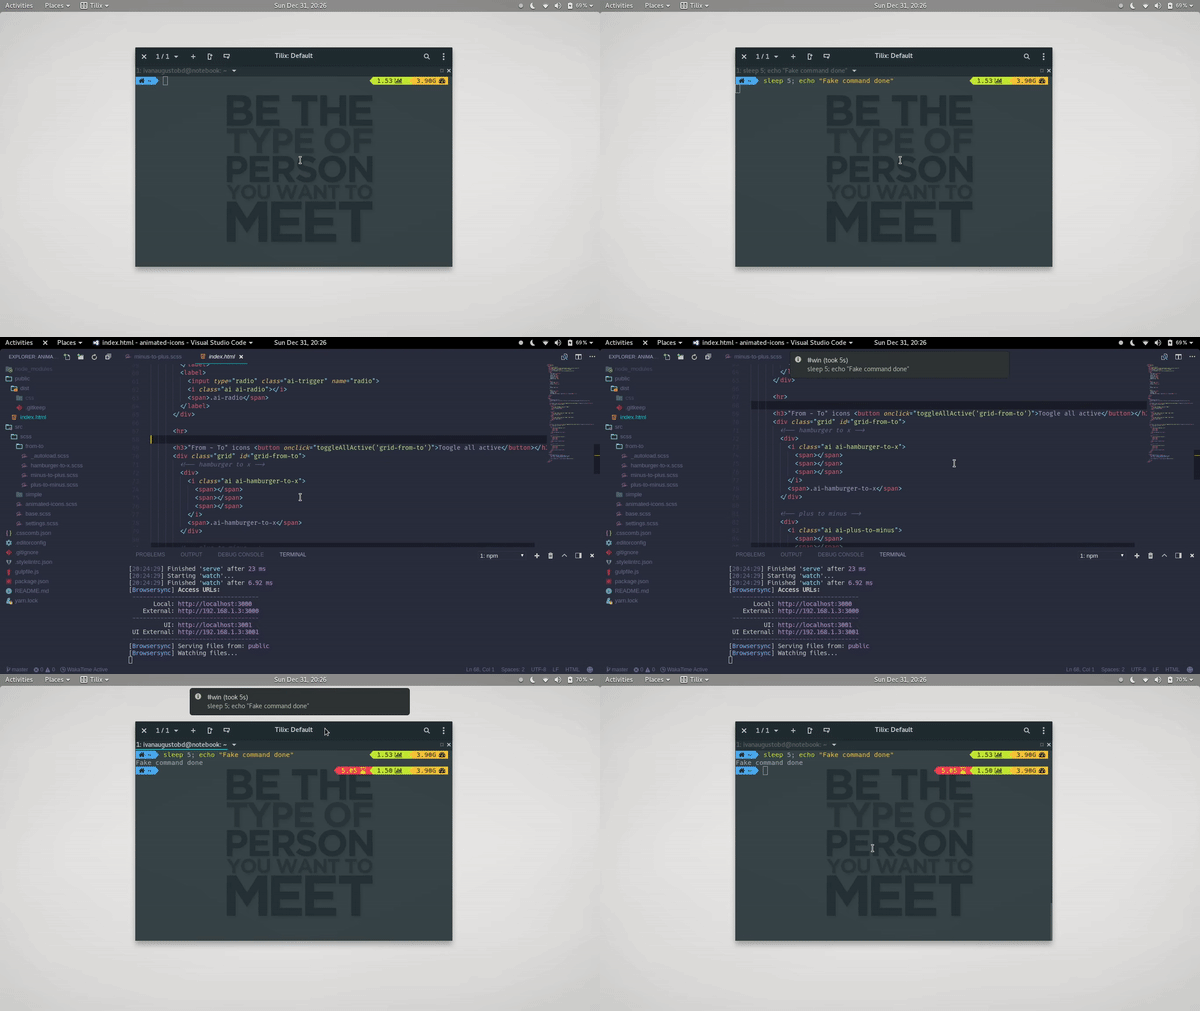
3°) Notifications. enabling the plugin “bgnotify”, any commands that are done in background will generated a system notification (useful for long-time commands, like laravel new <project>, npx create-react-app <project> and updates like composer update ou yarn upgrade):
4°) ColorLs. Just install it and create an alias alias ls="colorls --sd -A" and you will have a “iconic” ls:

The closer that I could came to that in it was using Oh My Fish + bobthefish theme:
curl -L oh-my.fish | fish
omf install bobthefish
But.. it don’t end up with all those features 😝
Concluding
I hope that you reduce drastically the time spent in the terminal with that :D
